How to Use a Percolator | Step-by-Step Guide
If you’ve landed on this page, chances are you’re ready to learn how to brew the perfect cup of coffee using your percolator. The aroma itself is enough to ‘perk’ up your senses, getting you prepped for the day.
In this step-by-step guide, we’ll walk you through everything you need to know about brewing mugs full of joe using your percolator.

What is a Percolator?
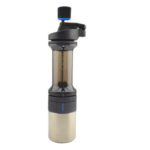
A percolator is a coffee appliance that resembles a pot or kettle. It has a chamber for water and a chamber for coffee grounds. Many people associate percolators with camping because they work just as great on a campfire as they do on a stovetop.
Just as there are stovetop percolators, there are also electric models. This means you just plug it in and let it work its magic.
How Does a Coffee Percolator Work?
The lower chamber of the percolator is for the water, while the upper one has a basket used to hold coffee beans. Your water will heat up either on the stovetop or electrically. As it heats, it is being forced through a tube that passes over the grounds and back to the bottom of the pot.
Unlike pour-over or drip coffee, percolators pass water through the grounds more than once. This makes it a bit tougher to control the flavor, but you better believe that it’s creating an aromatic cup of joe as the water drips down.
Making Coffee in a Percolator
New to percolating? Don’t be embarrassed if you haven’t mastered how to use this handy device. Percolators can work wonders when used right, and we’re here to teach you everything you need to know.
What You’ll Need
- – Coarsely ground coffee
- – Water
-
Step 1: Prep the Percolator
Making coffee in a percolator is simple. You always want to begin with a clean pot. Leftover grounds will affect the taste of your new batch. Make sure you thoroughly clean your percolator after every use.
Once you’ve cleaned your device, add water to the reservoir. Don’t exceed the maximum water level; otherwise, you’ll have watered-down coffee.
Generally, two cups of water will make one cup of joe.
Step 2: Add Coffee Grounds
Toss the coarse coffee grounds into the upper basket compartment. Use one tablespoon of grounds per cup. This will give you a strong brew. If you want a weaker taste, add a teaspoon of ground coffee per cup. Make sure your percolator is fully assembled with the lid securely fastened.
Step 3: Apply Heat
Place your percolator on the stovetop. Heat the water over medium heat. Do so slowly until it starts peaking. Reduce the heat to prevent the water from boiling. You shouldn’t see any steam coming from your percolator.
For electric models, plug them in and follow the manufacturer’s directions.
Step 4: Perk to Liking
Once your water is hot – not boiling or simmering – percolate the coffee for 7-10 minutes, depending on your desired strength.
Step 5: Let the Coffee Rest
Remove the pot from the heat from its done perking. You also need to remove the basket using oven mitts and throw out the grounds. Let the coffee sit for a few minutes. This is known as the resting period because it allows grounds to settle down to the bottom of the percolator.
The last thing you want is grounds making their way into your coffee, so be sure you don’t skip this step!
Frequently Asked Questions (FAQs)
Still have some questions on using a percolator? Here is a list of common questions we get asked all the time. Chances are, if someone asked them, you might be wondering the answer to them too.
What Beans Should I Use in a Percolator?
Coffee is brewed many times during the percolating process. If you go with dark roasts, you run the risk of your coffee being too overpowering. For this reason, it’s best to go with low-acidity coffees labeled as light-roast, mild, or smooth.
Another important note: use coarse coffee grounds. This will prevent them from making their way through the basket and into your freshly brewed cup of coffee.
How Much Coffee Do I Put in my Percolator?
Practice makes perfect, and after a few brews, you’ll know exactly how much coffee to put in your percolator pot. Typically, you want to use one tablespoon per cup of water to make a strong brew and one teaspoon for a weaker brew.
How Long Do I Percolate Coffee?
The answer to this depends on the strength you are looking for. Usually, it’s recommended to percolate coffee for 7-10 minutes. Make sure you don’t use boiling hot water or water that’s producing heat. This often leads to over-extracted coffee that will taste bitter.
On the other hand, make sure you don’t go with warm water since the water won’t be able to extract the maximum flavor. You want water that is hot but not boiling.
What is the Best Coffee Percolator?
The best coffee percolator depends on a few things. Check out this buyer’s guide to help you decide on the best option for you. However, you want to begin by deciding on whether you want an electric or stovetop percolator.
For an electric percolator, we love the Hamilton Beach Percolator. And, for a stovetop option, we strongly recommend the Farberware Yosemite Percolator.
Conclusion
Now that you know how to use a percolator, go out there and make yourself an amazing cup of joe. Protect your investment by cleaning it properly, and don’t be afraid to alter things if you’re not getting the desired results. Practice makes perfect, and it’s required if you want to master the percolating process.
Happy brewing!